Reading Your Knitting: How to See Mistakes Before They Cost You
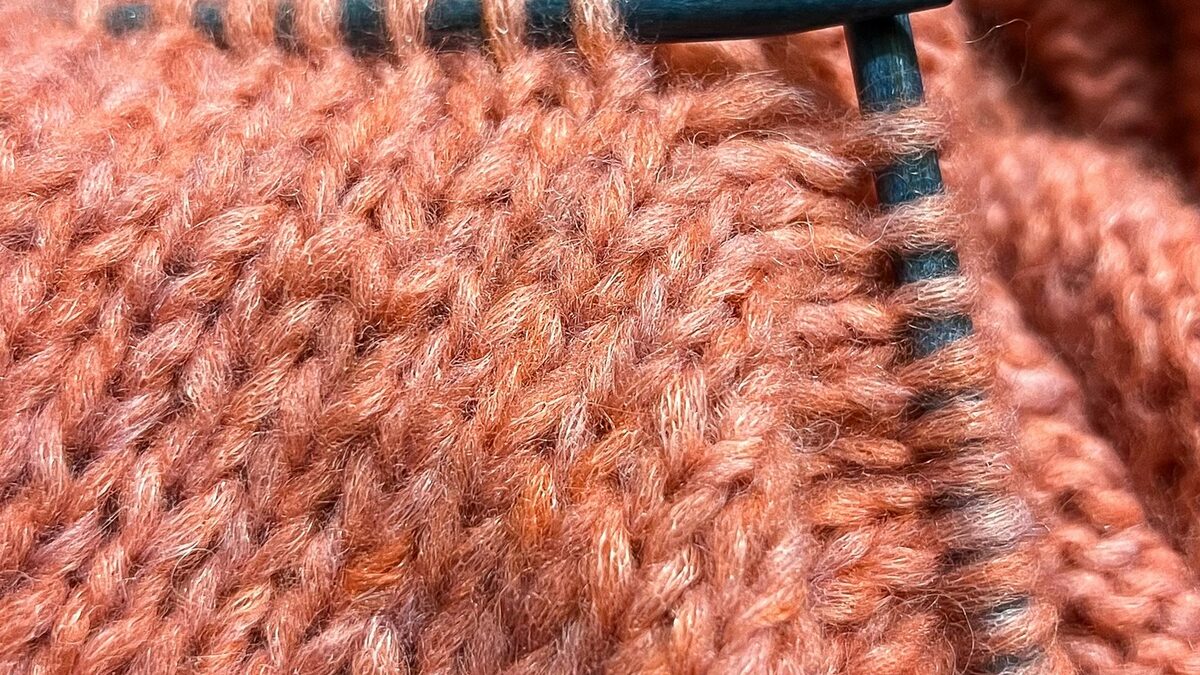
For years I knitted the way a lot of people learn to: watching my hands, not my fabric. I could feel when something was wrong — a row that took too long, a stitch count that didn't add up at the end — but I couldn't see it until it had already grown six, eight, ten rows further up the work, at which point fixing it meant unravelling real progress. Learning to actually read the fabric as I went, rather than just execute the moves, cut my frogging time by more than half. None of this requires special tools. It requires knowing what four or five specific things look like.
What a knit stitch actually looks like, from the front
A knit stitch, viewed on the right side, looks like a small flat "v" sitting on top of the row below. The two legs of the v should lean slightly, meeting at a point, with the right leg of one stitch's v crossing in front of the left leg of its neighbor. If you look at a column of stockinette and the v's look uneven — some narrow, some stretched wide — that's usually a tension problem, not a stitch problem, and it will usually even out with blocking. It's not the thing to panic about.
What a purl bump looks like, and why you need to find them
A purl stitch, from the same right-side view, looks like a small horizontal bump sitting just below the row it's part of — like a tiny bead strung on a line. In a stockinette fabric those bumps are all hiding on the wrong side, but the moment you're working ribbing, seed stitch, or any textured pattern, you need to be able to spot a stray purl bump sitting where a knit v should be, or vice versa. That single misplaced stitch is the most common beginner error, and it's also the easiest one to miss, because a lone wrong stitch in a sea of correct ones barely disrupts the overall texture until you've knitted another ten rows on top of it and the line of sight to it is gone.
Spotting a dropped stitch before it runs
A dropped stitch announces itself as a small horizontal gap — a visible rung — a few rows below your needle, with a loose loop of yarn sitting slightly proud of the fabric around it. Caught within a row or two, you can usually walk it back up with a crochet hook by catching the horizontal bar and pulling the stitch back through it, one rung at a time, without unravelling anything else. Left for ten rows, the same dropped stitch has usually started to run — the column above it unravels on its own as the fabric is handled — and at that point you're no longer fixing one stitch, you're rebuilding an entire column. The habit that prevents this: glance at the row directly below your working needle every few rows, not just at the stitches currently on your needle tip.
Twisted stitches, and why they're not actually invisible
A twisted stitch happens when a loop sits on the needle with its legs crossed rather than open, usually from picking it up wrong after a dropped-stitch rescue or from working into the wrong leg of a stitch. On the fabric, a twisted knit stitch looks subtly tighter and more vertical than its neighbors — the v is narrower and the stitch sits slightly higher. It's genuinely easy to miss in a photograph, but in person, running a finger across a row of stitches will usually catch it before your eye does: a twisted stitch feels like a small hard knot among soft, even loops.
Reading your decrease line
On a hat crown, a raglan sleeve, or a sock toe, decreases should stack into a visible diagonal or vertical line as you work — that's the whole visual point of lining up your decreases on the same stitch each round. If you look down at your decrease shaping and the line zig-zags instead of running straight, you've drifted a stitch at some point, usually by placing a marker one stitch off after a round where you lost count. Catching this within the next round or two is a thirty-second fix: shift the marker back to where the line says it should be. Catching it after ten more rounds means picking back a meaningful chunk of crown shaping.
Building the habit
- Stop at the end of every pattern repeat, not just every few rows at random, and count your stitches against what the pattern says you should have.
- Before you start a new row, look at the row you just finished — not your needles, the fabric — and confirm the texture looks like it's supposed to.
- If something looks even slightly off, stop and tink back (un-knit stitch by stitch) rather than knitting one more row "to see." The next row almost always makes a mistake harder to read, not easier.
- Keep a spare double-pointed needle or crochet hook within reach specifically for lifting a dropped stitch the moment you spot it, so fixing it doesn't require putting the whole project down to go find a tool.
None of this is about knitting slower. It's about looking at the right thing while you knit — the fabric that already exists, not just the stitch currently on your needle — so that by the time a mistake would normally become visible to someone glancing at your work from across the room, you've already fixed it three rows ago.